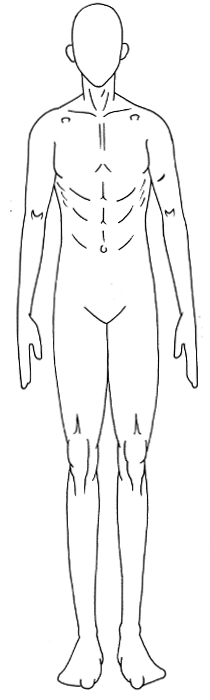
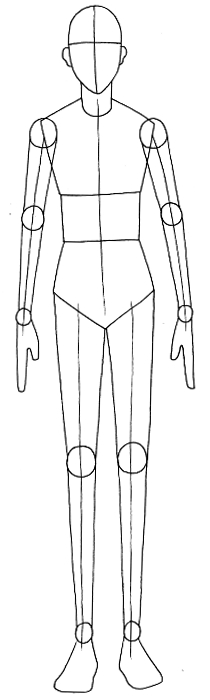
--------------------------- --------------------------- | - Drawing the Figure - The figure is the second hardest part of drawing a character. But luckily its fairly fast to learn. Once you learn the length of everything in relation to everything else, its easy. Once you learn the basic structure of anatomy, you can go into any of the other styles of art. Anatomy doesn't change in any style. Male - Alright, take a good look. Everyone has a few things they have trouble drawing. For me it was the lower leg. It took me forever to figure out how to come down off the knee properly. So study these, but more importantly, study yourself. If you have trouble with drawing a hand just look at your hand, and so forth.
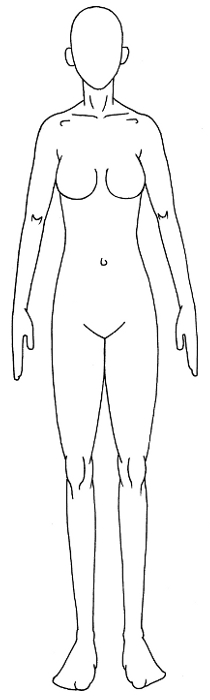
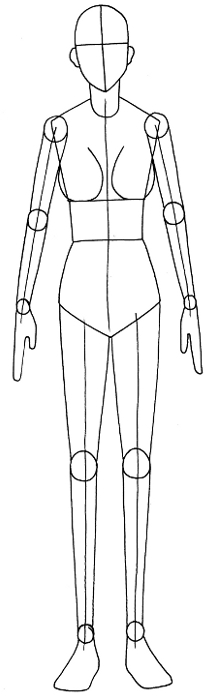
Female - Now for the male counterpart. Everything is in the same place, so nothing new to learn. Things are just shaped a bit differently. --------------------------------------------------------------------------------------------------------------------------------------------------------- Torso - |

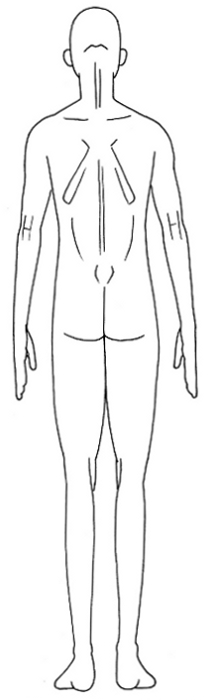

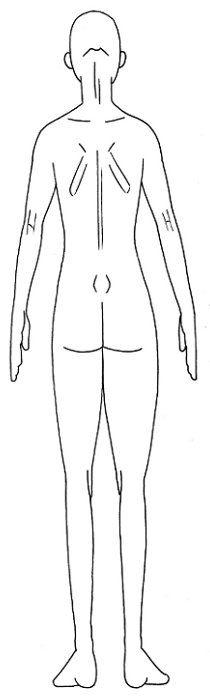
Back & Shoulder Blades - The farther back you put your shoulders, the closer together your shoulder-blades will get. Many 'hidden' muscles appear when squeezing the shoulder blades together This picture will give you an idea of what your dealing with. | 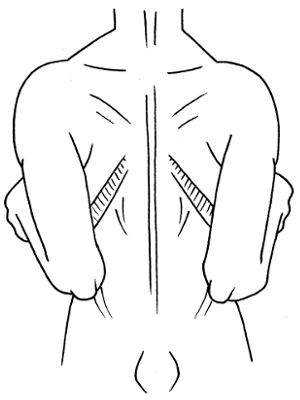 |
How arms effect the Torso -
I know how you want to squish the biceps when drawing an forward reaching arm. But the arm doesn't really mush the biceps at all. Its because the shoulder joints are conveniently located outside of the torso. You'll under stand this better if you raise your arm while looking into a mirror.
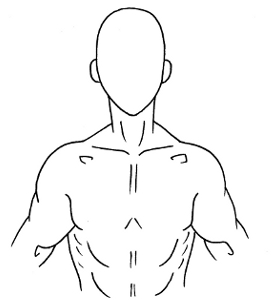 Arms backward. | 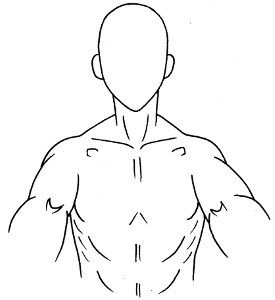 Arms forward. |
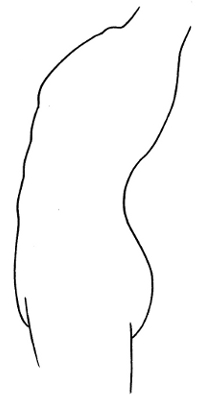
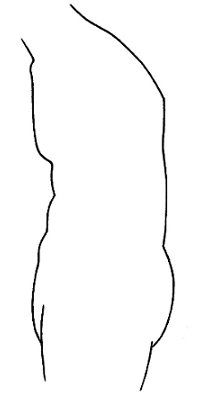
Bending the Torso -
The spine does nothing but bend. All stretching and contracting is done only by the abdomen and back muscles.
 |  |
------------------------------------------------------------------------------------------------------------------------------------------------------------------------
Arms -
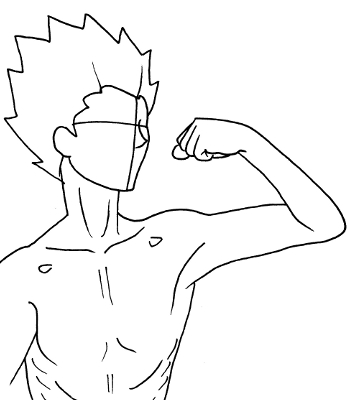
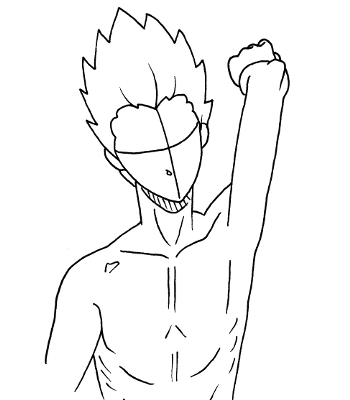
Raising the Arm -
When the arm raises halfway up, the shoulder will rise and the bicep will pull upward. The collar-bone rises only slightly.
When the arm raises straight up, the arm hinges upward pushing the shoulder muscles up close to the neck. The muscles along the side of the torso stretch with the arm.
If all else fails, try studying your own arm in a mirror.
 |  |
Bending at the Elbow - When the arm bends at the elbow, the muscles fold equally into eachother. The fold points directly at the elbow. | 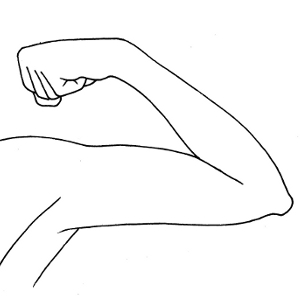 |
------------------------------------------------------------------------------------------------------------------------------------------------------------------------
Legs -
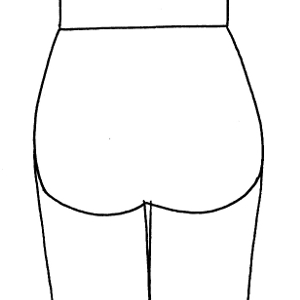
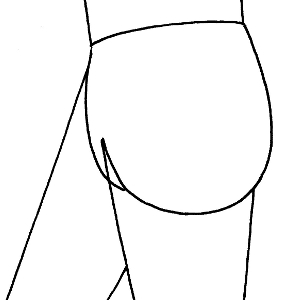
Leg Muscles - When your folding your leg back remember to flatten the muscles out. Its especially true if your character is sitting on his, or her, legs. | 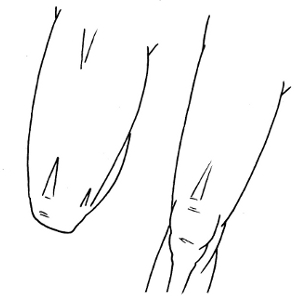 |
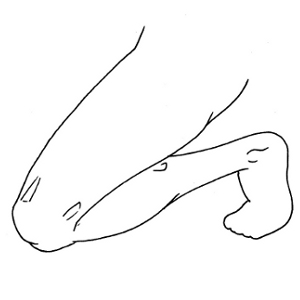
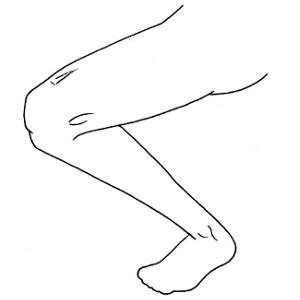
Bending at the Knee -
When bending at the knee the lower leg sinks into that small pocket in the back of the upper leg. Then the muscles press together and flatten each other out.
You might have a difficult time trying to figure out how to draw the knee. I know I did for a long time. It helps to look at your own knee. Watch and feel how it bends. Study it like its something you've never seen before.
 |  |
------------------------------------------------------------------------------------------------------------------------------------------------------------------------
Using Blocks and Lines -
Using lines - Simple lines are great for measuring the length of the torso and limbs. They are also great for figuring out the position of the limbs before you draw them. I use them often, so I know they work well. I prefer using lines instead of blocks simply because they are easier to erase, and they don't create tangled outlines. As you can see in the picture, once you pencil the lines it is easy enough to draw the character outline around them. Like using a center line with the face, these lines will help you balance everything out. Beginners Hint: | 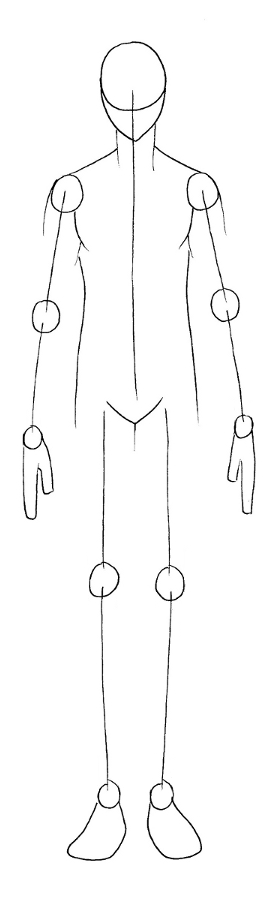 |
Using Blocks -
Blocks are great for practice. But I would not recommend using them to create a actual character. Blocks and real-looking body shapes are close enough that you might just want to go for the real shapes. Otherwise you'll just be doing twice the work for nothing.
Plus, molding a block figure into real shapes will create unwanted lines that become confusing.
So just stick with using them for practice. I myself enjoy haphazardly sketching out a block figure from time to time.
Like me, you shouldn't strain yourself over a block figure. Just roughly scratch it out with a pencil. It looks better that way.


Block figures are great for practicing how to put a character with an object. Pick a random object and create a block figure that is using it. 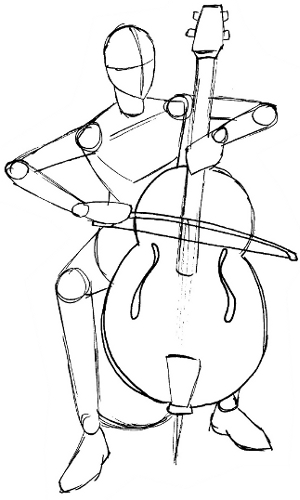 | Block figures are great for practicing your perspective drawing. When you practice using blocks, you feel more free to experiment with the shapes. 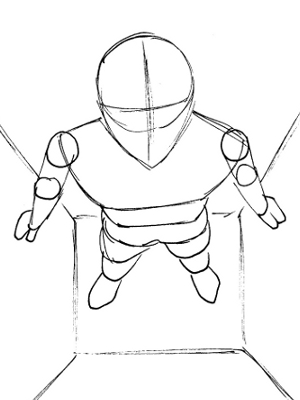 |
Try rounding the bottoms of the block torso no matter the angle of the body. It helps alot with drawing the legs in position. |
|
Practicing your Form - Now we all have scrap pieces of paper lying around the house. And those pieces of paper usually have stuff on one side. But don't waste them. Flip them over and practice drawing the human form. Not only are these fun, but very effective in increasing your drawing skills. You will be recycling by learning. And in addition, I really do like the look of my own block figures. There is something simplistically beautiful about them. |  |
Copyright © George S. This website was designed and published in 2009 by George S. All rights reserved. No part of this publication may be reproduced or used in any form or by any means – graphic, electronic, or mechanical, including photocopying, recording, taping, or information storage and retrieval systems – without the written permission of the publisher.